How Do I Perform a Hip Thrust Exercise in the Gym?
Breaking Down the Hip Thrust
Hip Thrusts and Their Benefits:
Hip thrusts are a fantastic compound lift that everyone can benefit from. They primarily work the glute max, aka the largest muscle that makes up your butt. However, other secondary muscles do have a role as well, including hamstrings, the glute medius and minimus, core, adductors, and even a bit of quads. The secondary muscles act as stabilizers, but should not be the main driver of the movement. So if you feel hip thrusts mostly in your quads, please keep reading and fix your form so you can reap the full benefits of the movement.
Speaking of benefits, hip thrusts are not just a great movement for growing the glutes for an aesthetic purpose (but this is a bonus as well). They also can help with the following:
Increase lockout power and driving mechanics of squats and deadlifts.
Improve acceleration and speed, so they are great for athletes of all kinds, but especially those such as runners, and players that rely heavily on speed and agility, like for football and soccer.
Strong glutes also improve joint functions that are essential for preventing injuries from activities ranging from high impact sports, to even walking.
Warming Up Properly
Like any compound lift, you don’t want to rush straight into a top set without warming up first. Before hip thrusting, try implementing the following so you get the most out of your lift and prevent injuring yourself:
Getting light blood flow circulation from 5-10 mins on a treadmill, bike, etc. No need to get your heart rate up too much, this is simply to get the warmup started.
Dynamic stretching. Using resistance bands and/or body weight to warm up the glutes is a great way for you to get mind muscle connection started before you load up the barbell or machine of choice for hip thrusts.
Try these if you don’t have a go to warmup routine:
Bodyweight walking lunges
Banded clamshells or banded abductions
Banded lateral walks
Bodyweight floor bridge
“The world’s greatest stretch”
Leg swings
Bodyweight squats
Once you get into your hip thrust, work up to your top set(s). If you don’t know where to start, a good rule of thumb is to start with the bar/machine weight/bodyweight, then go to 50% of your top set weight for a set or 2, then increase the weight to 70-75% of your top set weight for a set.
Executing the Movement:
Sit on the floor and rest your upper back against the edge of a bench, so the bench hits right below your shoulder blades. Make sure the bench is stable by placing it against a wall
Add a pad: Place a barbell, dumbbell, or kettlebell across the crease of your hips and use a barbell pad or foam for more comfort.
Place your feet: Put your feet flat on the floor about hip-width to shoulder-width apart. Slightly turn your feet outwards. Angle your shins so they form a vertical 90-degree angle when your hips are lifted at the top.
Engage your core: Brace your abs and pull your ribs down slightly to avoid arching your lower back.
Drive up: Push firmly through your heels to lift the weight, keeping engagement on your hips and glutes.
Lock out at the top: Squeeze your glutes hard at the peak. Your body should form a straight line from your shoulders to your knees, with your shins vertical.
Lower with control: Slowly lower your hips back toward the floor while maintaining tension before starting the next repetition.
There are 2 main hip thrust methods: the hinge and the scoop. It depends on your personal preference which one you choose. The set up is generally the same for both methods, but the main differences are as follows:
The Hinge:
You keep your gaze ahead of you at the bottom of the movement, and look at the ceiling when you reach the top of the movement.
Your head, neck, and torso mostly stay in alignment throughout the movement.
The Scoop:
The set up is the same as the hinge method, except this time you will keep your chin tucked, and your eyes facing forward for the duration of the movement.
With this method, ensure you keep a posterior pelvic tilt. Think about quite literally scooping your hips up and pushing the weight forward
Want a video demonstration? Check out this video for a tutorial from Bret Contreras, aka, The Glute Guy:
Variations:
Choosing how to set up for a hip thrust depends on what feels best for your body and experience level. The following variations each have their own benefit, so it’s important to try them and find what works best for you to keep you in proper positioning and getting the most out of the exercise.
Bodyweight
Dumbbells
Smith machine
Glute drive/hip thrust machine
Barbell
B-stance
Are Hip Thrusts Adaptable?
Hip thrusts might not seem like an adaptable movement but they absolutely can be!
Check out our incredible para-athlete, setting up for hip thrusts here:
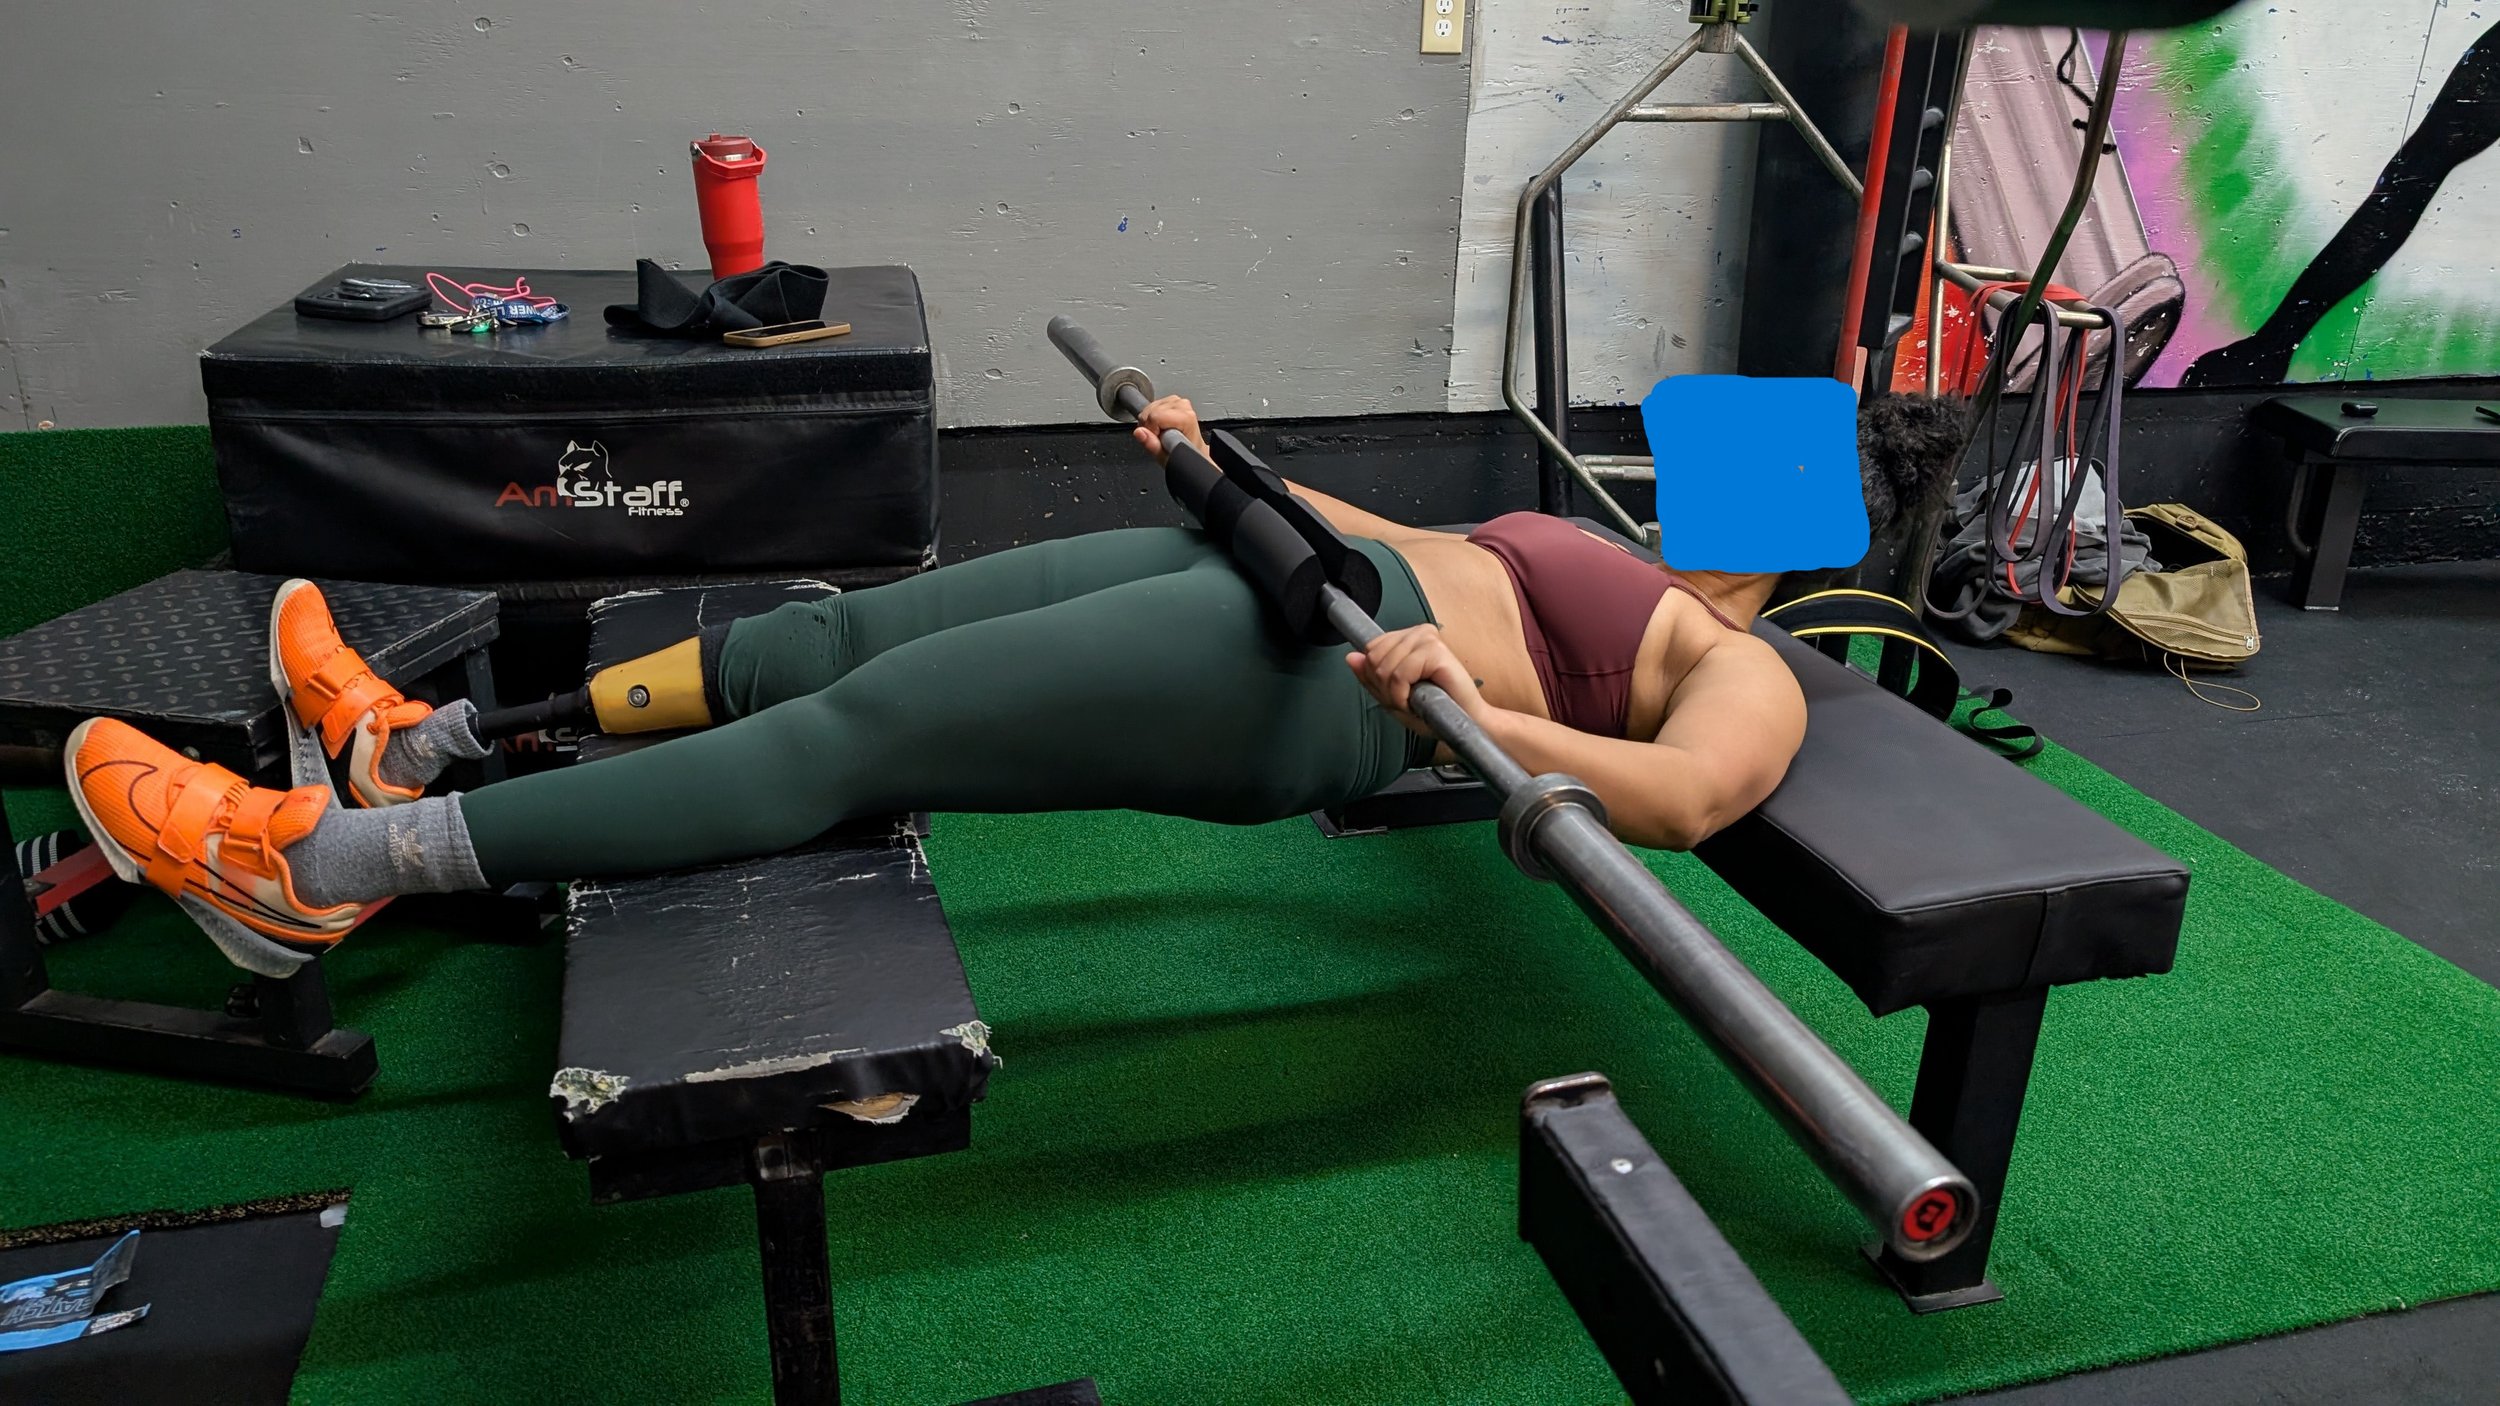
They set up a hip thrust with their feet up on a bench in front of them and has a partner place the barbell on their lap. By keeping their lower leg on the bench in front of them, it allows them to fully focus on pushing the weight up with their glutes, without having the prosthetic slide out of place, or cause discomfort by being put in an awkward position.
Hip thrusts are a simple, effective exercise that strengthen the backside, boost hip power, improve posture and daily movement, and lower injury risk. They suit all ages and goals—sports, rehab, or everyday comfort—and give big long-term benefits.